Friday 29 August 2014

Preserving Peaches


Beautiful ripe peaches that fill the air with their delicious fragrance are piled high in 20 lb boxes at my local market. It's time to buckle down and learn to preserve some of those delicious things I grew up on. 

I recall my mother telling me that she used to can 100 lbs of peaches, and similar amounts of raspberries and cherries. We had a huge cool room in our basement and one entire wall was filled with jars of fruit & vegetables. I don't think I'm quite that determined, our meals are seldom followed by dessert (as was the tradition in my family), and my access to fresh fruit is significantly more than we had when I was younger, so I'm not so concerned about stocking up. Simply, I've decided to can peaches because I love the flavour of home-canned fruit and it is a very good skill to learn. So, taking the plunge, I bought 40 lbs and set about learning something new. 

I am not a complete stranger to canning, I spent most of my summers helping my mom peel, cut, stuff and boil various things and I've been making my own jam for a few years, but this is my first experience canning fruit on my own. 

I learned a few things about getting the skin off the peaches and by the time I was done I had the timing down just perfect...60 seconds in the boiling water and a dip in ice water and those skins peeled right off.

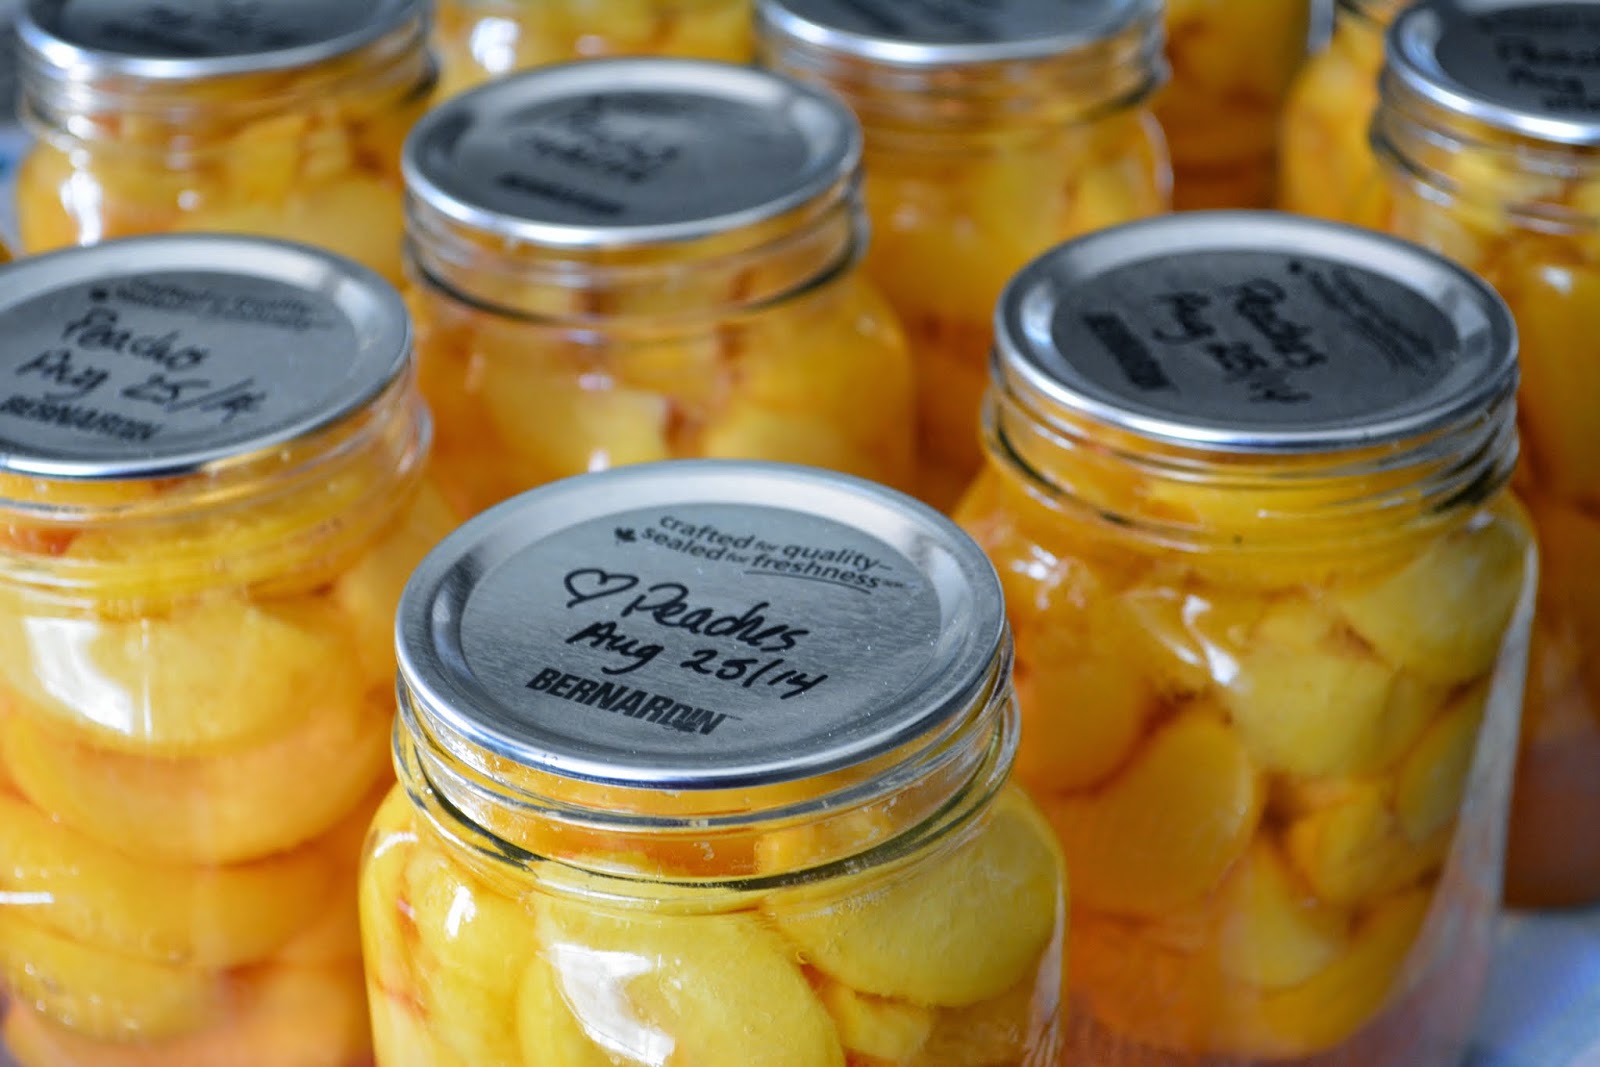
I managed to make a huge mess cutting up the peaches to put in jars, but in the end, I got 12 jars of beautiful peaches in a medium-light syrup, preserving that just-picked flavour for the cool rainy months when I can't find peaches in the store. I froze the rest of those 40 lbs as sliced peaches for smoothies and pies. The freezer is getting really full too!

One jar didn't seal, so we were able to have a taste of home-made canned peaches without waiting for the rainy season to start!

Well, there you have it, my first fruit canning experience done, I'd say it's a success...only one jar didn't seal! Now it's on to tomatoes...

~Adel~


Wednesday 27 August 2014

Sunshine Benny

Eggs Benedict is a favourite special breakfast in our house. It's Daddy Ladybug's absolute favourite breakfast and I will occasionally make it for dinner too.

Here's my take on the classic Eggs Benedict...aka heart attack breakfast!


Sunshine Benny

Makes 4 servings.

4 English Muffins
Butter
Garlic Powder
8 Eggs, poached
8 slices Tomato
Avocado Slices
Bacon, cooked crisp

Open English Muffins and arrange on a baking sheet. Spread butter on each open half and sprinkle with garlic powder. Broil until edges start to brown and butter is melted.

Make poached eggs, bacon, and Sunshine Hollandaise Sauce, keep warm until assembly time. 

Top each 1/2 of browned english muffin with a poached egg, tomato, avocado and a spoon full of hollandaise sauce. Top with crispy bacon and serve hot.

Delicious and fresh. A little work and good timing make this an amazing breakfast (or breakfast for dinner).

~Adel~


Sunshine Hollandaise Sauce

I'm always disappointed with restaurant Hollandaise Sauce, I like mine with a little more zip. This one has a little tang and always leaves me wanting to lick the pot when I'm done!


Sunshine Hollandaise Sauce

1/2 cup Salted Butter (Room Temperature), cut in 3 equal parts
3 Egg Yolks, beaten
1 Tbsp Lemon Juice
1 Tbsp Water
Pepper

Melt 1/3 of the butter in a warm sauce pan on medium-low heat. Mix egg yolks, lemon juice and water in a bowl and pour into sauce pan. Mix quickly with a whisk to incorporate butter, once it starts to thicken, add another 1/3 of the butter and mix while it melts, once sauce begins to thicken again, add remaining butter and stir with whisk until it melts and sauce thickens again. Remove from heat, season with pepper as desired, and serve immediately. If sauce gets too thick or curdles, add a Tbsp of hot water and whisk until smooth. To reduce the risk of curdling use a double boiler. 

Great with a Sunshine Benny, veggies, fish or poultry.

~Adel~

Monday 25 August 2014

Creamy Garlic Chicken Pizza

One of my favourite pizzas is a garlic chicken pizza from a little italian bistro. It is so yummy. I have attempted to replicate it, sorry, it's not as good, but still pretty fabulous!


Creamy Garlic Chicken Pizza

(If making thin crust, save 1/3 of the dough for pizza sticks or freeze for another day)
2 cups Mozzarella Cheese
1 cups Grilled Chicken
1 Red Pepper, sliced thin
1 Tomato, diced
1/4 Red Onion, sliced thin
1 Roasted Garlic Bulb, cloves squeezed out and chopped
4 Mushrooms (your choice), sliced thin
Fresh Basil Leaves, ripped or chopped
Parmesan Cheese

Spread pizza dough on pan, creating a little ridge around the outside to keep the toppings in. Spread sauce on pizzas and top with 1/2 mozzarella and the rest of the toppings. Top with remaining mozzarella and bake in a 375 F oven for 17-20 minutes until crust is golden. 

Makes 1 large rectangular pizza or 2 -12" pizzas.

Pizza Friday here we come!

~Adel~


Creamy Garlic Pizza Sauce

Sometimes I just want a creamy sauce on my pizza, chicken pizzas just seem so much better with a little creamy garlic sauce. Here's my favourite!


Creamy Garlic Pizza Sauce

2 Tbsp Butter
3 Garlic Cloves
2 Tbsp Flour
1 & 1/4 cup Milk
Salt & Pepper
dry mustard powder
1/2 cup Parmesan Cheese

In a sauce pan, melt butter. Add minced garlic once bubbly and cook for 30 seconds before adding flour. Stir flour in and cook for about 1 minute. Add milk and stir until bubbly and thick. Season with salt & pepper  and mustard powder as desired. Add parmesan cheese after removing from heat and stir well. 

Makes enough for 1 large rectangular pizza or two 12" pizzas.

Make this sauce tonight for a delicious Creamy Garlic Chicken Pizza or make your favourite Pizza with my Best Ever Pizza Dough!

~Adel~

Wednesday 20 August 2014

Slow Cooker Chicken Pad Thai

I've been experimenting with new meals lately. Some aren't working out so well, but every once in a while I come across something that really works. Daddy Ladybug loves Pad Thai, so I've been working on a twist on the traditional recipe that works for the slow cooker. 


Slow Cooker Chicken Pad Thai

2 Tsp Tamarind Paste*
1/4 cup Fish Sauce
2 Tbsp Chili Sauce (I used sriracha) 
2 Tbsp Lime Juice
3/4 cup Chicken Broth
4 cloves Garlic, minced
1 Onion, sliced thin
4 Chicken Breasts, cubed
1/2 cup Crunchy Peanut Butter
2 Tbsp Cornstarch + water
Cilantro
Green Onions
Bean Sprouts
Hot Thai Chili Peppers
Lime wedges
Cooked Rice Noodles

*Tamarind paste can be found in the asian section of your supermarket or at asian/indian stores, sometimes also called Tamarind Concentrate, in a pinch, substitute low sodium soy sauce (you probably will need to add more to get the flavour of concentrated Tamarind).

Combine tamarind paste, fish sauce, chili sauce, lime juice,  & chicken broth together in a bowl and mix well to dissolve tamarind. Add chicken, garlic, onion and sauce together in slow cooker. Cook on low for 5 hours or high for 3 hours.

About 1/2 hour before serving, add peanut butter and a mixture of cornstarch and enough water to dissolve the cornstarch. Stir well and replace the lid. Cook for another 1/2 hour then add cooked noodles. Toss to coat noodles and serve with cilantro, green onions, bean sprouts, hot peppers, and lime. Best served immediately.

Enjoying a little taste of Thailand straight out of the slow cooker...

~Adel~


Monday 18 August 2014

Camping Kitchen

The kids and I have managed to get in 7 camping trips this year and Daddy Ladybug has been able to join us for 2 trips with our extended family. I've had lots of practice setting up/taking down camp by myself and figuring out what is the most efficient way to camp with my kids. I'm getting better every time. It is not easy camping alone with kids, but we have so much fun...only once did I seriously consider packing them up in the middle of the night to go home! It's only mid-August and there's several weeks left in the camping season, but I think I might be done for the year, I'm kinda burnt out! Ready for the scheduled life of the fall to return, anyone else feeling that way?? 

I get asked a lot what my kitchen looks like when I'm camping, so here's a post with pictures and organizational ideas that I use when camping to keep my family fed!


The typical camp set up at a BC Provincial Park (this is Cultus Lake). 

They generally have a BBQ attachment to the table so I use that as my starting point and build from there. BBQ or stove go on the metal extension and the folding table (from Costco) goes beside it. The big rock at the end of the table is almost always there, so I use that as a boundary for the kids..."don't go past, it's hot!" I usually bring a bucket for a garbage can, but I forgot it this trip so I improvised with a garbage bag tucked under the stove. The shelter tent usually depends on the weather...over the table if it's rainy or further back if it's dry as a play hide-out from the mosquitoes! 


The kitchen drawers go under the table and the washing bins/draining rack go on top. 

This year I'm trying a new camping organizational strategy, instead of 3 bins, I'm now down to 1 (which holds the bigger stuff like the washing bins) and 2 sets of drawers...one for the clothes and toiletries and one for the kitchen. I've fallen in love with my camping kitchen drawers. No more digging through bins to find things, it feels so organized! This has also reduced the amount of space my camping gear takes up in my vehicle. The best thing about the drawers is they can serve as a side table for the late night glass of wine at the campfire when the kids go to bed.


Inside the kitchen drawers... Cutlery/cooking utensils.


Lighter, clothes line, dish towels/cloths, other random tools & small first aid kit.


Smaller dishes - bigger ones are in a bin.


Nesting pots and wrapped up in hand towels is my french press (very important when your children wake up with the birds...)


Water and iced tea jugs (frozen before I go to use as ice for the cooler) sit on the table for easy access. I try to encourage everyone to have lots of fluids when it's hot.

There you have it, my camping kitchen. 

I create a lot of things here, but it's pretty much a consistent diet of hot dogs, mac & cheese, and s'mores when it's just me and the kids, but occasionally I break out the fancy stuff (and they complain the whole time)!

Happy Camping!

~Adel~


Wednesday 6 August 2014

Cherry Cola Cooler

I love cherry coke so when I see an easy dessert that claims to be just like it, I have to try it out! Cherry Cola Coolers (Kraft).They weren't lying. I don't have pretty cupware like they do, but here's my attempt at something delicious and easy, a perfect sunny afternoon dessert. Next time I'm going to make a double batch and fill those cups up! It really tastes like cherry cola, jello with a little fizz! 


1 cup Cola
1 cup Boiling Water
1 package Cherry Flavoured Jelly Powder
Pre-made sweetened Whip Cream (they called for cool whip...I'd rather have the real thing)
Fresh Cherries

In a bowl, add cola. In a separate bowl, mix jelly powder and boiling water. Pour into bowl and mix well with cola (important not to do it the other way around or you will get LOTS of foam). Pour into serving dishes and let cool in a fridge for about 1 hour before serving. Top with whip cream and cherries.

(makes 4 servings)

My version of Kraft's "What's Cooking" Summer '14 recipe - Cherry Cola Coolers


YUMMY!

~Adel~

Monday 4 August 2014

Greek Hobo Pack (Foil Dinners)

Camping season is in full swing and we've just returned from a week-long camping trip with extended family. I didn't do much cooking on this trip (thanks nana ladybug!) so I don't have much to show for my week as far as food goes, but the weather is still really hot here at home and cooking inside is pretty much out of the question, so it was back to BBQ dinners. Here's the absolutely delicious creation I came up with tonight!


Greek Hobo Packs

(per person/pack)

1 Chicken Breast
1/4 cup Zucchini
3 Button Mushrooms, quartered
1/2 cup Red Pepper
3 small Red Potatoes, cubed
1 clove Garlic
3 Tbsp Onion, cubed
3 Tbsp Feta Cheese, cubed
1 slice Lemon
1 Sprig Rosemary

Combine ingredients in aluminum foil and wrap tightly. Cook on fire or BBQ (medium heat) for 20-30 minutes until chicken is cooked and potatoes are tender. Let sit for 5 minutes before opening packet (be careful for the steam!). 

Yum Yum Yum. 
I think I might make that again tomorrow!

~Adel~