Showing posts with label children. Show all posts

Wednesday, 12 July 2017

Cheesy Hashbrown Potatoes

This deliciously easy side is a staple for family gatherings! 

I can't tell you how many casserole dishes of these I've made in the past couple years, but I know I bring one to every Easter, Thanksgiving, and Christmas gathering, plus the many times I bring it to other family gatherings or other communal meals with friends. I've started making mine in the slow cooker so I can have them without heating the kitchen in the summer or a great way to make more room in the oven for busy holiday meals, but it works great in the oven too! 


Cheesy Hashbrown Potatoes (Slow Cooker or Oven)

1/2 cup Butter (melted)
1 Onion, diced
2 cloves Garlic, minced or your favourite garlicky seasoning (like Johnny's from Costco...yum)
1 can cCondensed Mushroom Soup
1 cup Sour Cream (substitute Greek Yogurt for some or all)
250ml container of Herb & Garlic Cream Cheese
7 cups Frozen Hashbrowns (one of the smaller sized bags)
2 cups Shredded Cheddar Cheese
1/2 cup Corn Flakes

Slow Cooker: I like to brown my onions before tossing them in the slow cooker, but it's not necessary, just adds more flavour to the dish. Combine the melted butter, diced onion, garlic, soup, sour cream, cream cheese together in a saucepan and heat until all the cheese melts and everything mixes together in a gooey sauce. Add Hashbrowns to the slow coker and pour cheesy sauce over. Mix well and cook until potatoes are heated through, about 2-3 hours on high. Top with corn flakes before serving (you can put them under the broiler for a few minutes if you want the top to be golden brown.

Oven: Melt butter in a saucepan, add onions and cook until slightly browned. Add garlic, soup, sour cream, cream cheese together in a sauce pan and heat until all the cheese melts and everything mixes together in a gooey sauce. Mix with hashbrowns and pour into an oven safe dish. Top with corn flakes. Bake at 350 F for 30-40 minutes until sauce starts bubbling and the top is golden brown.

This recipe freezes really well, perfect for a big cook/freezer meal and makes a great alternative to Mashed Potatoes!

~Adel~

Saturday, 25 October 2014

Natural Cough Candies for Kids (Happy Throat Pops)

Cough, cough, cough. Sneeze, drip, drip, drip. Mommy, I have "BOOGERS"!

Ugg. I am tired of the non-stop cold that seems to circulate around my house in the winter, anyone else with me? It starts a few days after school begins and ends a few days after they finish. Kids and germs - yuck. 

I've scoured my local pharmacies many times late at night trying to find something I can give my kids, but there's almost nothing for kids under 6. Seriously, why is it so hard for a company to come up with a safe solution on a stick so our kids have something to soothe a sore throat?

Well nothing commercial seems to exist, so I decided to make my own (plus then I get to make them with ingredients I want my kids to have). 


Happy Throat Pops

4 bags Lemon & Ginger Tea
1 cup Hot Water
2 cups Honey* or Agave (you can also use sugar)
1 Lemon, Juice and grated peel
4 drops Lemon Essential Oils**
candy thermometer (or skills at using the candy test with cold water)
popsicle sticks
Popsicle molds

(*Do not give honey to children under 1 year of age. **Please make sure your essential oils are safe for ingestion, Click here for my recommendation.) 

Brew a strong cup of Lemon & Ginger tea using hot water and 4 tea bags. Let sit for about 15 minutes before beginning to make your pops. In a large pot, add tea, honey, and the juice/grated peel of 1 lemon. Stir until mixture comes to a boil, stop stirring and bring mixture to 150C/300F or Hard Crack Stage (this takes a while as the water boils off). Let cool a bit until mixture starts to thicken and stir in 4 drops of Lemon Essential Oils. Pour into oiled (cooking spray works well) candy molds (or make your own with cornstarch or confectioners sugar) and insert sticks. Let cool until fully hardened then remove from molds.

Happy throats, Happy kids, Happy Mom.

It's nice to finally have a natural solution for the cold & flu season.

~Adel~

Thursday, 18 September 2014

Goat's Pride Dairy

With our public schools on strike, we've been trying to find ways to keep all of our children entertained and educated (and us moms sane!), so a group of us have been working together to find places that will give us educational tours. 

This time we went to Goat's Pride Dairy in Abbotsford, BC. I'd post their website, but I haven't been able to find one! It's in the northwest part of Abbotsford on Olund Road, nestled in the hills near the fraser river. We drove down tiny farming roads to find this gem.


Nothing is more exciting to me than food & farm related field trips because that's what I love, local people putting their heart and soul into making beautiful things, especially things that taste delicious!


This wasn't just fun for me, it was fun for Lady & Bug and their friends to visit a farm, see how animals live, practice milking a goat, and discover how the things we eat are made (Bug is a huge cheese fan).


This was a real working farm, not a tourist destination, so it wasn't set up for taking beautiful pictures of the process. We peeked through fogged windows as the cheese maker stirred a huge pot, saw the milking area (but it wasn't milking time), made a goat craft, and played with the goats - who were huge fans of all the attention. A lovely little tour for our crew


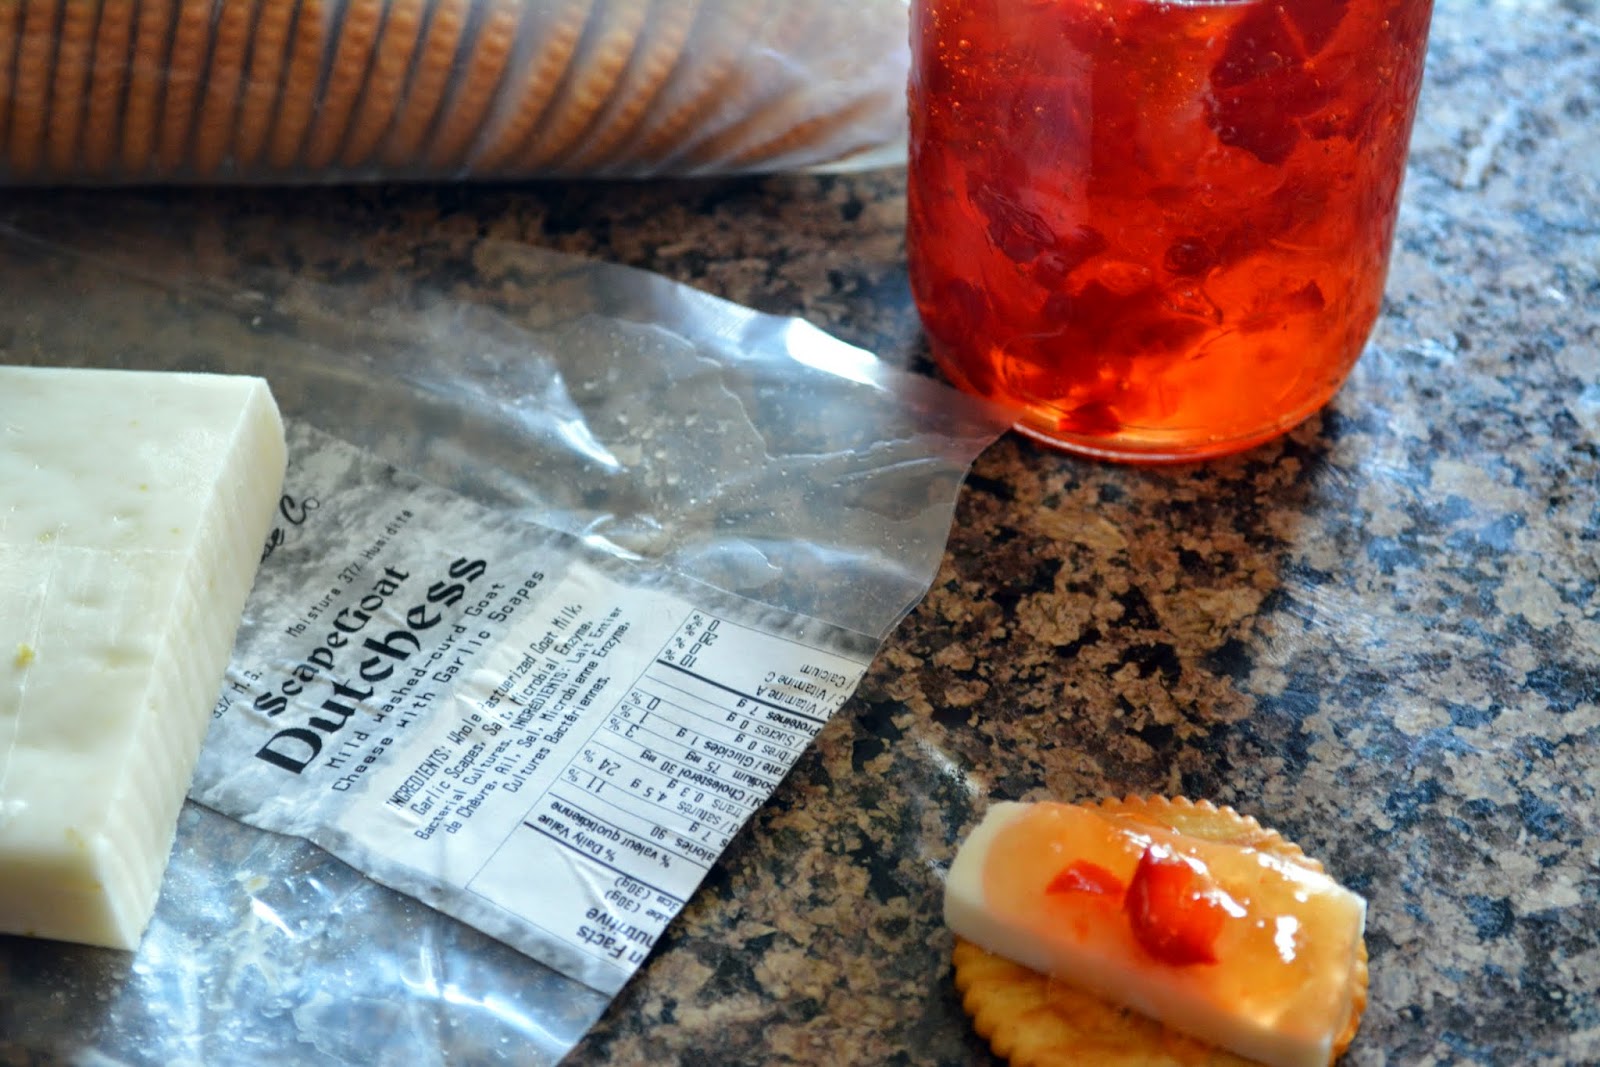
Best of all, we brought home some goat's milk to sample and some amazing cheese, which I happily munched on with my freshly made Pepper Jelly and a glass of wine!

Fun for all of us!

~Adel~

Sunday, 7 September 2014

Homemade Pepperoni Pizza Pockets

Daddy Ladybug loves all things convenience. He especially loves the food of his childhood, so today I decided to try my hand at Pizza Pockets.


Homemade Pepperoni Pizza Pockets

2 1/2 cups Flour
1/2 tsp Salt
2/3 cups Regular or Butter Flavoured Shortening
1/2 cup Cold Water (more or less as needed)
1 cup Pizza Sauce, divided in 2 (make your own!)
1/2 cup Pizza Pepperoni, chopped in small chunks
1/2 cup Mozzarella Cheese, shredded
1/4 cup Parmesan Cheese
1 tsp Italian Seasoning
1 egg, beaten

Make pastry crust by mixing flour and salt in a bowl. Cut in shortening until it is the consistency of oatmeal and slowly add cold water 1 Tbsp at a time, mixing with hands, until the dough sticks together but not sticky. Roll out to about 1/4" thickness and cut 5" circles. Should make about 12 circles.

In a separate bowl, add 1/2 cup of pizza sauce to bowl, saving remaining sauce for dipping. Mix in pepperoni, mozzarella, parmesan and seasoning.

Spoon 1 Tbsp of filling into the middle of each circle, fold in half and crimp edges together with a fork, fingers, or a pastry pocket maker, ensuring edges are well sealed. (note: It's easy to want to overfill, but I've learned that adding more than a Tbsp of filling makes it run out or be difficult to seal well

Place filled pockets on a greased baking sheet and brush tops with beaten egg. Bake for 20 minutes at 375F until tops start to become golden.

Heat remaining 1/2 cup of pizza sauce and serve on the side as a dip.

A great homemade lunch option, or make a double or triple batch and freeze partially cooked (about 15 minutes) and cook in the microwave to heat up for a quick snack. Great for kids, hungry teens, and Daddy Ladybug's post-hockey starvation!

~Adel~


Wednesday, 6 August 2014

Cherry Cola Cooler

I love cherry coke so when I see an easy dessert that claims to be just like it, I have to try it out! Cherry Cola Coolers (Kraft).They weren't lying. I don't have pretty cupware like they do, but here's my attempt at something delicious and easy, a perfect sunny afternoon dessert. Next time I'm going to make a double batch and fill those cups up! It really tastes like cherry cola, jello with a little fizz! 


1 cup Cola
1 cup Boiling Water
1 package Cherry Flavoured Jelly Powder
Pre-made sweetened Whip Cream (they called for cool whip...I'd rather have the real thing)
Fresh Cherries

In a bowl, add cola. In a separate bowl, mix jelly powder and boiling water. Pour into bowl and mix well with cola (important not to do it the other way around or you will get LOTS of foam). Pour into serving dishes and let cool in a fridge for about 1 hour before serving. Top with whip cream and cherries.

(makes 4 servings)

My version of Kraft's "What's Cooking" Summer '14 recipe - Cherry Cola Coolers


YUMMY!

~Adel~

Saturday, 14 June 2014

Homemade Instant Oatmeal


I'm so tired of buying instant oatmeal and using 2-3 packs per person just to make a meal, plus, I really like to know what's in things I serve. So I'm making my own and thought I'd share for anyone else who's tired of going through an entire box of instant oatmeal in 1 sitting.

Saturday, 12 April 2014

100+ Things to do with Kids in Abbotsford, BC


I have been looking for a good list of things to do with kids in my home town (Abbotsford, BC, Canada) and so far I haven't found one, so I decided to do some research, ask fellow parents, talk to childcare workers, consult city resources, and scour the internet for ideas.

I figured I'm not the first parent to ask the same question, so I thought I'd share my list! If you live in the area and have some suggestions of things to add I'll do an update every once in a while with new things!


Friday, 27 September 2013

Happy 3rd Birthday


Happy 3rd Birthday Lady & Bug!

Lady & Bug turned 3 last week. I find throwing parties overwhelming - I'm happier to have a simple, low-key affair, so this year we decided to rent a local centre that had some pretty cool ride on toys and balls instead of having it at our house. I made a few snacks, the kids played, and the adults visited. 


Of course, what birthday would be complete without a birthday cake. I'm not much of a cake decorator but the rainbow cake with white butter cream icing was delicious. I wish I had got a shot of the inside, but alas, it was gone before I could find my camera! It was similar to this http://www.omnomicon.com/rainbowcake, but I just used a white cake mix & food colouring!

Of course, it was decorated as instructed by my 3 year olds with white yummy "sugar" and a pink & blue 3! 


Also as requested, Rainbow Shots of Gold.


And there's a little peek into Lady & Bug's 3rd birthday.

~Adel~


Friday, 2 August 2013

Cheeseburger Macaroni

Daddy Ladybug love Hamburger Helper, but I like to make things from scratch as much as possible, so it's forbidden in our house. Here's my version of a great easy meal that everyone will love.


Cheeseburger Macaroni

2 lb Ground Beef
1 cup Onions, diced
2 cloves Garlic, minced
4 cups Milk
1 cup Water
4 cups Elbow Macaroni (uncooked)
2 Tbsp Sugar
2 tsp Seasoning Salt
1 & 1/2 tsp Oregano
1 & 1/2 tsp Parsley
1 & 1/2 tsp Garlic Powder
2 tsp Paprika
1/2 tsp Black Pepper
1 Tbsp Beef Oxo (broth seasoning)
2 cups Valveeta Cheese, cubed (or shredded cheddar cheese if you want to be healthy!)

Brown meat. Add onions and cook until tender, add garlic for 30 seconds. Add milk, water, macaroni, sugar and seasonings. Stir well and bring to a boil. Reduce heat, cover, and simmer for 8-10 minutes until macaroni is tender, but not overcooked. Remove from heat and stir in cheese. Cover and let sit for 5-10 minutes before serving to allow the liquid to absorb.

This is a large recipe, makes about 8 generous portions and you might even have left overs for lunch too!

Don't buy Hamburger Helper - make this delicious easy meal instead.

~Adel~


Saturday, 20 July 2013

Camping Play Canopy


Lady & Bug love to play with cars and figurines and that doesn't change when they're camping.

The rain, the hot sun, and the lack of shade due to damage from the mountain pine beetle in our area make finding a protected place to play in camp grounds difficult. 

Daddy Ladybug came up with an ingenious way to keep the kids contained - safe from the blistering sun and dry in the rain. We've tried it on a few of our camping trips this year and they have stayed entertained and safe from sun & rain for many hours at a time. It was a life saver for us so I thought I'd share!

Supplies needed:
  • some kind of shelter - a tent, canopy, tarp, or RV awning
  • a table or rug for kids to lay on
  • a play mat (if you don't have one you can make something out of cardboard)
  • toys - cars, dolls, figurines, etc.
First, set up your shelter over a picnic table or area that will not be flooded and is protected as possible from the sun. Then place a play mat on the table or in the middle of the rugged area. Add toys and kids and voilà, you've got a protected place to let kids play! If you want to see more ideas for camping with kids check out my camping page.

Now grab yourself a nice cold beverage and sit back in your camping chair!

~Adel~


Sunday, 23 June 2013

Clean Campers

The one thing I hate about camping (we're talking real camping...not camping in an RV with water/power) is that there is no dishwasher (I love my dishwasher) and no sink for washing hands and general cleanliness. I always feel like I'm dirty and that nothing really gets cleaned when you're camping so here's my take on camping cleanliness - cleaning for dishes, dirty hands, and general cleanliness when there's no comforts of home!


For keeping the dishes and food prep clean and healthy, I've got two basins (Rubbermaid) that I keep on the picnic table and an expanding dish rack (IKEA) for washing dishes. They all fit nicely together and go in the bottom of my Camping Essentials Bin. Hot water from the kettle and some dish soap help to kill germs on dishes. Don't forget food safety even when camping!


I use one of those Rubbermaid bins for hand washing before & after meals and any time during the day. It just stays on the table the whole day. Hand soap and a towel are close by! I also keep hand sanitizer for those times when water isn't available or when you've just changed a messy diaper in the middle of making dinner and water & soap just don't seem like enough!! Those little kiddies can get mighty dirty playing outside too - that water is usually black before dinner! Just keep a kettle on the camp stove and quickly warm it up every once in a while if you want warm wash water.


I also have a toilet kit for bathroom cleanliness as I find a lot of our more rustic camp grounds do not have a water supply conveniently near toilets or are lacking in toilet paper. I've used an idea I saw on Pinterest  (can't find the original idea, but there is the link to the post I saw) and added my own little touches...


...some hand sanitizer and a flash light for those late night trips to the toilet. The lid fits on nicely over everything to keep it together & dry.


Then there's general body cleanliness - get rid of the body stink when there's no showers (or no lake to wash it off!). Easily solved by a rub down with baby wipes or a basin of warm soapy water. My mother used to call them little "bird baths" when I was a kid - almost as good as a shower in the morning! Especially great for those longer camping trips. For little ones, I usually fill the basin (or fill one of my camping storage bins for the bigger kids) and give them a sitting bath to keep them smelling a little better and keep the diaper/sweat/heat rash at bay! And don't forget to wash feet at the end of the day - nothing worse than a tent full of foot stink while you're trying to sleep!

Remember to refill your little camping soap containers with biodegradable soap (I like Dr. Bronner's) to keep nature happy & healthy!

If you want to know what else I pack for a camping trip with kids - here's my Camping with Kids Packing List.

You really can be clean while you camp (if you want to be)!

~Adel~

If you would like to see my other ideas for camping with kids check out my Camping Page.


Tuesday, 11 June 2013

Personal Profile and Emergency Information Sheet

So this post makes me seem like an overly paranoid and cautious parent, always expecting the worst, but I'm really not. 

Experience has taught me that it's good to be prepared for emergency situations. 

I have worked in the Caregiving industry for years and one of the staples of every outing was this sheet that we packed around with us in case we had a missing client or if we needed to make an emergency trip to the hospital - all the information we needed was right there on that sheet. Sometimes that sheet came in really handy!!

I thought it was a great idea to add to my binders. We already have one for Uncle Ladybug and Ms. Ladybug, so why not have one for Lady and Bug as well! They are a great addition to my camping binder and family info binder. It's easy to take this sheet (or the binder) with you when your kid breaks their arm while camping away from home...


Each profile sheet includes the following information:

  • Full name and nickname
  • Recent picture
  • Current address
  • Home/emergency contact (my phone number!)
  • Date of birth
  • Height, weight, eye colour, hair colour
  • Medical card number
  • physician's name & number
  • Dentist's name & number
  • (any other medical professionals that your child might need to contact in case of emergency)
  • Medical conditions
  • Current medications (include all names & dosage)
  • Allergies (list suspected allergies too)
  • Emergency contact information (parents - home, work & cell #'s and 2 others that can be contacted in case of emergency e.g. grandparents)

Well, there's my paranoid mommy moment - hope it helps you!

Here is a Blank Personal Profile and Emergency Information Sheet just in case you don't want to make up something on your own!

~Adel~

If you want to see more of my ideas for camping with kids - check out my Camping Page.


Sunday, 9 June 2013

Day Out with Thomas


Day Out With Thomas

Not everything goes as planned in the Ladybug house...

On Saturday we went to the West Coast Railway Heritage Park in Squamish, BC  to have a "Day Out With Thomas".

It should have been a great day of fun with Thomas, riding trains and what can only be the best day of their lives...instead is a disaster!

We managed to leave home on time for our 1 & 1/2 hour journey to visit Thomas in Squamish, but the second we hit the curves on the Sea to Sky Highway, Lady mentioned that her tummy didn't feel good. 

I gave her Gravol, like a good mommy, and we kept going. 


We were almost in Squamish when she said that her tummy hurts again and blah...she pukes everywhere. All over her clothes, her blankie, & her carseat. Me, being a great mommy, forgot the diaper bag with the extra clothes in it, so we cleaned her up the best we could and stripped her down. Thankfully I did have their swimming stuff in the car and her jacket so I could put something on her and we searched the town for some new clothes. 

She now owns more expensive jeans than I do because that was all we could find for pants that fit her! (we later found a walmart...oh well, we shopped local...right??).

Once we got to the rail yard to see Thomas Bug's meltdowns started (man do I ever hate the 2's...can't wait until this stage is over!!!). He couldn't understand that pushing the stroller around (by himself of course..."NO I do it!") is not ok in a really crowded place where he runs over everyone. So meltdown #1. Seriously, the only kid in the place who is having a meltdown while Thomas is coming in, so Lady gets to have pictures...


Eventually we calm Bug down and he gets in one:)
Then we take the train ride and have a snack. It's a pretty disappointing ride (for the adults at least)...


Then we go see what the rest of the site has to offer and Bug has another meltdown in the middle of the train tables area because he can't understand why he can't have all the trains on the table (Seriously, why would you do that to parents...these kids can't share yet!).

Mommy's done...time to have lunch and go home. So much for a fun family day out! Thankfully I'm too busy managing meltdowns and puke that I don't have pictures of the bad times!


Lessons learned...
1. Give gravol to children who get motion sickness before you leave.
2. When they say they have a sore tummy, stop and let them out for a bit.
3. Always bring a change of clothes for each kid.
4. Bug is obsessed with pushing the stroller, so just don't bring it...we don't really need it any more.
5. Don't take them to a public train table where they have to share trains with other kids...just avoid it altogether!
6. Don't go...it's not worth the drive, the time, or the money! If you do go, don't buy tickets, just go see the sights and skip the lame train ride - the train was the only time they checked the tickets!

~Adel~


Wednesday, 22 May 2013

Surviving a Road Trip with Babies & Toddlers


"The world is a book and those who do not travel read only one page." - St. Augustine


I love to travel, especially road trips, but I often have to do it by myself as Daddy Ladybug's responsibilities keep him close to home. Most of my close friends and family live far away, so road trips have become a staple in my life. 

I used to do big road trips several times a year, but everything changed when I had kids. Kids make travelling a little more difficult, but not impossible. With a little planning and lots of flexibility and courage, travelling with kids can be a great adventure. My family travelled at every opportunity when I was a kid and those are some of the best memories I have. I hope to give the same opportunity to my children.

I took several road trips the first year with two little babies and managed to survive...even enjoy it. I'm not gonna lie - it's tiring, stressful and exhausting - just like parenting, but it has some amazing rewards too. Every year we take a few more road trips and it gets easier as I learn new tricks and they get older! This weekend was a long weekend and I took Lady & Bug north to visit their great grandma & aunts & uncles & cousins. It was about a 2400 km drive - about 30 hours of travelling! I've learned a lot of lessons from my travels and thought I'd share them with you. 

Here are some of the tips I follow when taking a road trip with babies & toddlers:
  • Have a plan - where you're going, where you're going to stay, where you're going to stop along the way. 
  • Expect that plan to NEVER go the way you want it. Keep your expectations low and be flexible.
  • Research. Spend some time looking at the best child-friendly places to sleep, eat & play along the way.
  • Plan to stop at tourist attractions that are age appropriate for your children. Make the trip entertaining and educational.
  • Be prepared. Think through various situations and make sure you have a plan for each of them - break downs, sickness, 
  • If you don't already know the basics of car care - learn to jump start your car, change a tire and check & fill fluids & tires.
  • Lots of remote places still don't have cell service, but make sure yours is with you & charged (bring the car-charger).
  • Bring the phone numbers of the place/people you plan to stay at or stop each night or your destination.
  • Don't forget to check in with those at home.
  • Plan 15-30 minute stops every 2 hours with babies (especially young ones that need to feed often) and every 3-4 hours for toddlers.
  • Expect the trip to take longer than it takes you to travel by yourself. I plan an extra hour for every 4 hours if it were just me.
  • I find that 5-6 hours is the perfect amount of time for travelling each day, but I usually go for 8 and deal with the crankiness!
  • Try to keep your schedule as much as possible if your children are scheduled in regular life. 
  • Try to eat healthy foods on the road instead of fast food. Everyone will be happier & feel better on the trip.
  • Find a good park every 3-4 hours for toddlers to get out and run. Have a picnic there or bring take out food.
  • Pack lots of snacks. Apples & muffins are staples on my road trips along with goldfish and home-made trail mix
  • Bring lots of water to keep everyone hydrated. Sippy cups are handy even for the bigger kids in the car.
  • Make playlists of kids songs that you can stand or adult songs that are fun for kids. 
  • Kids stories on CD or on your ipod make great entertainment for 2+ toddlers
  • DVD player is a life saver!
  • Bring a backpack with a towel (or change pad), wipes, diapers & a change of clothes for each kid and you. Keep it stocked and easy to take when you have to run into a gas station or restaurant to change a diaper or clean up spills. Expect to use this often.
  • If your children are potty trained, bring a little potty, wipes & changes of clothes. They don't always need to go when there is a bathroom and squatting in the bush can be intimidating for some kids.
  • Expect your vehicle to get very messy. I bring wipes, little doggy-do garbage bags in a dispenser & a mini vacuum to clean the mess at my destination and at home. It gets really bad!
  • I bring 2 playpens & bedding for both kids everywhere because it keeps their bed semi-familiar. A large dark-coloured sheet & thumb tacks is also a great asset for trying to get kids to sleep in unfamiliar bright rooms.
  • Don't forget the important comfort things...toys, special blankies or stuffies.
  • Take 1/2 the clothing you think you need (for you and for the kids!), I always end up not using most of it. I plan to wash clothing every 3-4 days if possible.
  • My children travel in light comfortable clothes - T-shirt, pyjama bottoms/leggings & socks. Shoes & jackets are off, but close by to put on when they get out.
  • Small cars, trains & figurines make great travelling toys (one for each hand) for toddlers. For babies, attach plastic chains with soft toys/mirrors/bells to keep them entertained.
  • Crayons & paper also work great to entertain kids.
  • If you have a car seat tray, you're lucky! If you don't they are a great investment if you do a lot of road trips or fashion one out of a cookie tray.
  • I always have to remind myself that I need to keep talking to them - they start to wonder if I'm there when I don't talk to them.
  • It is always easier with at least 2 adults in the car, but you can do it by yourself!

Road trips are a great way to see the country, meet new people & learn new things. 
Don't be afraid to travel with children!

Happy Travels!

~Adel~

p.s. I'd love to hear your travel tips!

Sunday, 5 May 2013

Ice Cream Bars!

The joy of having little kids is watching them experience things for the first time!

Lady & Bug haven't really had the opportunity to have ice cream bars before, maybe a lick or two of daddy ladybug's last summer, but never their own. The lovely weather we're having right now called for some cold sugary treats...chocolate ice cream bars!

I did not make these, I'll probably try to come up with something eventually, but for now - store bought is perfect.


mmm...ice cream is so delicious!


Things were fine at first...aren't they always?!


Then the window became really exciting...


now I have to wash the windows again.

I love watching them discover new things!

~Adel~


Wednesday, 1 May 2013

Lil' Cleaner

Today was sunny and I was washing windows.


Lady decided that it would be great to help me out and spent the rest of the afternoon dipping her cloth into the water and rubbing the window...it's very clean now!


Then she decided that the table needed to be cleaned and proceeded to spray cleaner to help her wash the table.


Then she helped mop the floor.

Such a big helper!


Not to be outdone by his "big" sister, Bug decided to join the party (sans pants).

I was left with a sparkling clean patio and little wet sock prints on my floor!

Yay, now I can delegate the cleaning!

~Adel~


Monday, 22 April 2013

Lil' Bakers


I make Banana Muffins about twice a week, it's a house staple for breakfast & snacks!

This time Lady & Bug seemed very interested in what I was doing and had to get in on the action. They dragged their little chairs over to the counter and asked to stir. I gave them a couple of bowls and my dirty measuring cups & scrapers. The also wanted to use the banana peels - why not, you can't make banana muffins without bananas!

They had a blast. Pretend baking is a daily part of play in the Ladybug house, so this time it seemed a little more realistic. They pretended to bake muffins and lucky for me, there wasn't a huge mess to clean up. I was only left with some dirty hands and dishes that I would have to wash anyway.

A little pretend baking never hurt anyone! Maybe one day I'll be brave enough to handle the mess and let them really help me make muffins.

~Adel~

Saturday, 20 April 2013

All the Small Things

It was a cold day and we all wanted hot cocoa, but why have normal cocoa? We had to have them in my vintage Tupperware kids cups...mini marshmallows and all!


So much fun in a little cup.

~Adel~

Tuesday, 16 April 2013

Bath Soap Crayons

Bath time is the favourite time of the day in our house. I can get Lady & Bug to stop doing anything when I say it's bath time! They got some special soap from our cousin who is the wonderful soap maker at Unicorn Sparkle and they played with it until the slice I gave them dissolved.

It gave me a great idea...I've seen these bath crayons on Pinterest (check out bathactivitiesforkids.com) and had to give them a try. Here's my attempt!


Bath Soap Crayons

8 squares Glycerine Soap (found mine at Michael's)
Gel Food Colouring (you can use regular, but my research indicated that the Gel is easier to clean...very important to me!)
Essential Oils (whatever you want)
Soap Moulds/Ice Cube Trays (mine are from Ikea)


First I cut up my 8 squares of soap and melted them in a measuring cup (30 seconds at first, then in 10 second increments until the soap is completely melted and hot...do not boil). Then I divided my soap into three small bowls and added colour to each. This needs to be done quickly because the soap will harden fast. If it does become hard, just pop it back in the microwave for 20 seconds. Mix the food colouring in well and add the essential oils. 


Pour into moulds and let harden for at least 30 minutes.


The finished product. 


We cut each stick in half so that they would last a little longer. Lady & Bug loved their bath soap crayons and it was an easy project!


~Adel~


Thursday, 28 March 2013

Easter Water Table


It was a beautiful day here on the "wet coast". It actually felt like summer if you were in the sun! Lady & Bug spent the day outside enjoying the sunshine and what could be better than a big bin full of water, plastic Easter eggs and glass stones. Nothing like finding an activity that will consume their every waking moment for an entire day! 

First I emptied a plastic bin I found in the garage. Makes a great water table...who needs to spend $100  on one of those fancy ones...just put it on a low table on the deck.

I added glass stones (5 bags) that I got from the dollar store (best $5 I've spent on them...can't wait to use these again and again!)

Tossed in the plastic eggs for the Easter egg hunt on Sunday...why not use them for more than just Easter!

Then filled the tub with warmish water (and kept refilling as the water got tossed overboard).

Added some spray bottles, spoons & small bowls to make it a little more fun (Lady is obsessed with her spray bottles as you can see).

They played and played and played and played...


The sun finally went down and it got too cold to play outside - 8 hours of fun from one little tub of water.


We are doing this again!

~Adel~